Peppermint cake pops(icles) from scratch

I got a request for cake pops around Christmastime. Although I did actually make them for the holidays, I’m just now getting around to posting this DIY project. But, the good news is, peppermint-flavored treats are delicious any time of the year!

Note: These are usually served room temperature, but I decided to mix it up by freezing them and serving them like popsicles. Major success!

You will need:

  1. 1 box white cake mix (go ahead and bake the cake before you start this proejct)
  2. 1 can vanilla frosting
  3. 1/2-1 tsp. peppermint extract
  4. An assortment of chocolate, sprinkles and other confections to use for coating the cake pops.
  5. Lollipop sticks, red ribbon and a glue gun
  6. Mini muffin wrappers

Here’s the breakdown: (inspired by Bakerella‘s cake pops recipe).

  1. DIY Peppermint Cake PopsAfter cake is cooked and cooled completely, crumble into large bowl.
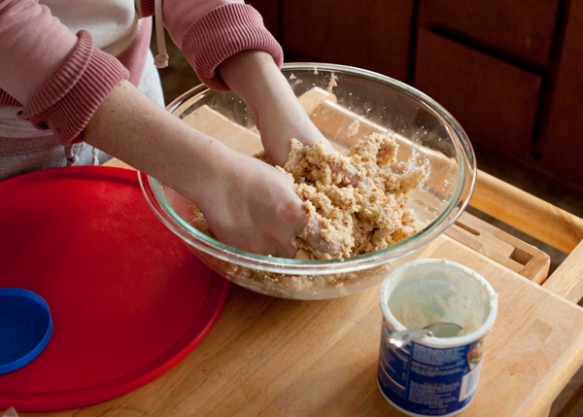
  2. DIY Peppermint Cake PopsMix thoroughly with 1 can frosting and peppermint extract.
  3. Roll mixture into quarter size balls and place on wax paper covered cookie sheet.
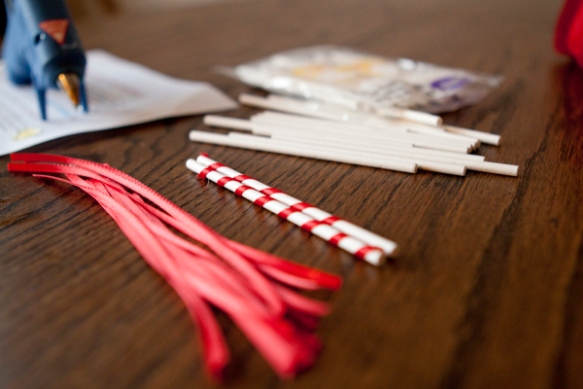
  4. DIY Peppermint Cake PopsPlace them in the freezer for a little while to firm up. While the cake balls are chilling, I used a glue gun to lightly adhere red ribbon around the lollipop sticks for some added peppermint-inspired flair.
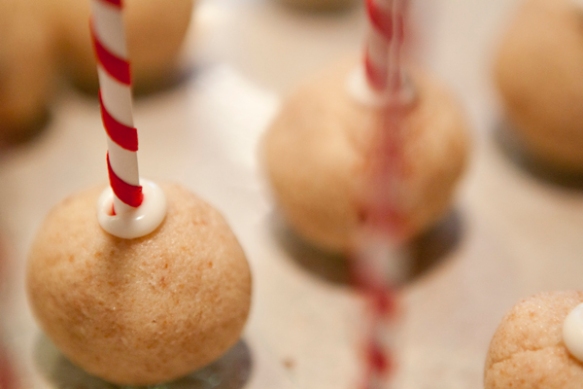
  5. DIY Peppermint Cake PopsUsing a double boiler (here are some helpful tips from Ghiradelli about melting/tempering chocolate for dipping), melt chocolate down and dip tip of your lollipop stick in a little of the melted candy coating and insert into the cake balls. This will help keep the cake pop on when you’re coating it.
  6. DIY Peppermint Cake PopsOnce firm, carefully insert the cake ball into the candy coating by holding the lollipop stick and rotating until covered. Once covered remove and softly tap and rotate until the excess chocolate falls off. Don’t tap too hard or the cake ball will fall off, too.
  7. While still wet, roll cake pops in crushed candy.

Day 3: For your foodie friends…a set of exotically infused sea salts from scratch

DIY Gift Hand-infusd Salts

  • Savory: Rosemary Sea Salt (good for fresh baked bread, chicken, pasta)
  • Citrus: Orange Zest Sea Salt (good for caramels, sundae toppings, truffles)
  • Robust: Merlot Sea Salt (good for steaks, potatoes, baked kale)

The breakdown:

Yield: Three jars of sea salt
Compare to: William Sonoma’s finishing sea salts collection ($39.95). You save $29.95!

Time to create: 25 minutes + drying time (overnight)

  • 3 glass jars with corks ($1.29 each/$3.87)
  • 1 box of sea salt ($2.49)
  • fresh rosemary ($2.49)
  • orange ($0.49)
  • merlot (I only used about an ounce of wine from a $5 bottle)
  • TOTAL: about $10

Instructions:

DIY Hand-infused salts For all three varieties, you will blend in the food processor. Once mixed, spread salts on baking sheet (lined with parchment paper). Bake at 200 degrees for 30 minutes until sea salt is dried. I also left the salts out overnight to make sure they were completely dried out.

  1. Rosemary: Pulse rosemary and sea salt in food processor/cuisine art for 1-2 minutes or until rosemary is blended and oils are infused.
  2. Orange: Peel orange and remove white part from rind (or use zester to remove rind). Pulse rind and sea salt in food processor for 1-2 minutes or until combined
    DIY Gift Hand-infused Salts, orange zest
  3. Merlot: add 1/2-1 ounce of merlot with sea salt in food processor and blend for 20-30 seconds until blended
    DIY Gift Hand-infused Salts, merlot

Day 2: Better-than-store-bought, eggnog from scratch

Part of my holiday traditions include making (and consuming, of course!) homemade, eggnog from scratch. I got a couple requests to post a DIY article about this so, without further ado…

DIY Eggnog from ScratchYield: 8 servings (1 quart-sized mason jar)
Time to create: 20 minutes
Notes: Below is a recipe for cooked eggnog based off the Joy of Cooking instructions (I’ve enhanced it to make it a little more nog-ish). At the end, I will give instructions for both the alcoholic and non-alcoholic versions. 

  1. Combine and set aside: 1 cup milk (or 1/2 cup milk + 1/2 cup heavy cream; depending on how thick you want your nog to be).
    DIY Eggnog from Scratch-whole milk
  2. Whisk together: six egg yolks + 2/3 cup sugar + 1/3 tsp. nutmeg.
    DIY Eggnog from Scratch-eggs, white sugar, nutmeg
  3. Heat in a saucepan: 2 cups milk (or 1 cup milk + 1 cup heavy cream) + 2 cloves + 1 tsp. vanilla.
    DIY Eggnog from Scratch-whole milk, cloves, vanilla
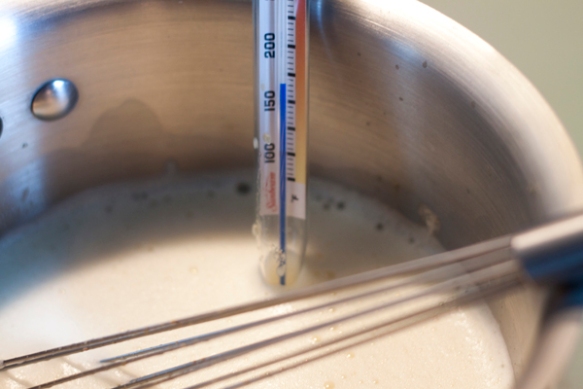
  4. Once the milk reaches about 150 degrees, slowly add about an ounce of the hot milk into the egg mixture. Then slowly pour the eggs into the saucepan.
  5. Stir constantly until the temperature reaches 175 degrees (but no more, because your eggs will start to scramble!)
    DIY Eggnog from Scratch-cooked eggnog
  6. Remove from heat and slowly add the cold milk mixture. Strain into storage or serving container.
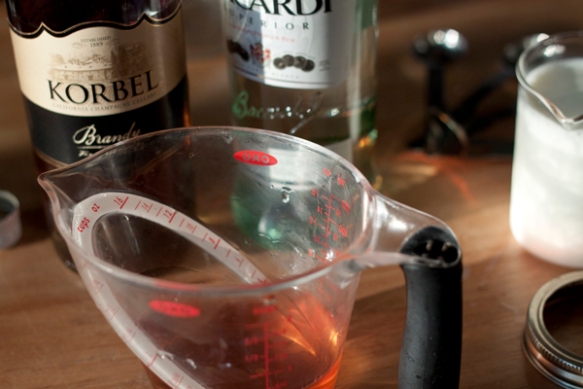
  7. Alcoholic version: Once cooled, add 1/2 cup – 3/4 cup of brandy, cognac, bourbon or spiced rum.
    DIY Eggnog from Scratch-alcoholic version, brandy, cognac, rum, bourbon
  8. Non-alcoholic version: add another teaspoon of vanilla or 1/2 cup strong coffee.
  9. Sprinkle with nutmeg and serve!
    DIY Eggnog from Scratch

Day 4: 20 minutes + $3 + used flower vase = an elegant votive candle holder!

  1. Use rubber bands (of varying thickness) to “block” off your design
    DIY From scratch Candle Holder
  2. Spray pant outside of vase. Wait for paint to dry (I put on two coats)
    DIY From scratch Candle Holder
  3. Remove rubber bands and…ta da! Instant candle holder!

The breakdown:
Time to create: 20 minutes

  • 1 used flower vase (you know, those vases that you use once and then stick in your cupboard to get covered and dust): free
  • 1 small can of spray paint (I used antique bronze): $2.99
  • a bunch of rubber bands (I used 6-8): free
  • votive candles: $2.99 at Michael’s. Or, check out my post on making candles for under $6!
  • TOTAL: $2.99

Day 1: Make one bottle of vodka into TWO bottles of Kahlua (or lots of mini gift bottles of Kahlua!)

On the first day of “from scratch” gifts, my true love gave to me…”two bottles of kahlua, made from one bottle of Vodka, and a partridge in a pear tree” (okay, I’ll stop making Christmas carol puns now).

How did I perform this vodka-kahlua magic trick you ask? Watch below as I make it in 60 seconds!

Impressive, no? Okay, in real life, it took me 10 minutes. Still not too shabby! This is an excruciatingly easy “from scratch” recipe and could come in handy if you need a last-minute present idea.

The breakdown:

Yield: Two 750ml bottles of Kahlua
Compare to: a 750 ml. bottle of Kahlua coffee liquor ($17.95) you save about $12.45!

Time to create: 10 minutes

  • 1 750 ml. bottle of vodka (go bottom shelf on this one, you’re mixing, it’s fine!) ($9.95)
  • 3 Starbucks via sticks ($2.95/3-pack) or 1/2 brewed espresso (about $0.25)
  • 2 1/2 cup sugar (about $0.50)
  • 4 cups water
  • 2 TBSP vanilla extract (or 1 vanilla bean, split lengthwise)
  • TOTAL: $11.00 (2x 750ml bottles of Kahlua) or $5.50 for each bottle

Instructions:

  1. Mix sugar, vanilla extract, coffee and water in a medium saucepan and heat until sugar is disolved. Depending on how syrupy you want you Kahlua to be, you can reduce the liquid slightly.
  2. Pour mixture into bottle or mixing bowl. Add vodka (add more if you want a stronger liqueur).
  3. Shake and serve! (Unlike many liqueur recipes, this can be consumed immediately. Although, it doesn’t hurt after it sits and steeps awhile either!)

Get ready for 12 days of “from scratch” gifts!

12 days of "From Scratch" Gifts!Let the 12 Days of “From Scratch” Gifts begin! (Okay, well, it will begin tomorrow, but let’s get excited!)

Each day, I’ll upload instructions, tips and “from scratch” inspirations to help you create affordable, creative (and AWESOME!) gifts for the holiday season.

I’ve already planned some great gift-spirations, but I’d still love to get your input! What gifts would you like to see me create? If I end up using your project idea, I’ll make one for you too!

Attention ginger lovers! Ginger Ale from scratch (delicious, easy to brew and made with fresh ingredients!)

I don’t like soda that much, but I looove ginger ale. Although soda is not expensive to purchase, it is saturated with high fructose corn syrup and unidentified “artificial flavors.” Looking for a more flavorful (and less health-hazardous) option, I decided to make it myself!

Unlike many sodas, ginger ale can be brewed without expensive carbonation machines or other equipment.

The breakdown:
Yield: This ginger ale/beer recipe fill a 64 oz. growler jug or 1-liter recycled soda bottle
Time to create: 20 minutes + 1 hour +  2 days

Ingredients:
Note: If you don’t want to wait 2 days for the yeast/sugar to carbonate the beverage, you can just make the ginger syrup and add that to seltzer water.

  • 1 growler-sized jug or a recycled 1-liter soda bottle
  • 3 TBSP fresh, finely grated ginger root
  • 3 strips lemon peel (yellow part only) *optional
  • 1 vanilla bean or 1-2 tsp. vanilla extract (My favorite ginger ale is Vernor’s, which after researching, I discovered had vanilla flavoring in it.) *optional
  • 3/4 cup sugar
  • 1/8 tsp active dry yeast
  • 2 TBSP fresh lemon juice
  • 7 1/2 cups distilled or filtered water

Preparation:

  1. In a saucepan over medium heat, bring the ginger, sugar, lemon peel, vanilla and 1/2 cup of water to a slow boil. Stir until sugar is dissolved.
  2. Remove from heat. Cover and steep for one hour.
  3. Use a mesh strainer to filter liquid from the solids. Make sure to squeeze all the extra water out of the ginger mash (you will lose a lot of the ginger goodness if you don’t!)
  4. Let syrup chill to room temperature and then add to your growler/recycled bottle.
  5. Add 7 cups water, lemon juice and yeast to ginger syrup. Shake to mix ingredients.
  6. Store in a room that has a constant temperature of 68-72 degrees (to keep the yeast activated) and allow the ginger ale to rest at room temperature for 2 days.
  7. Check for the desired carbonation, then chill and serve.

Theo Dorres Aromatics: Seattle vendor blends tea from scratch!

I was at the Mercer Island Farmer’s Market “Harvest Market” earlier this month and came across a stand of hand-blended teas created by Theo Dorres Aromatics.

They…were…amazing! I drink a lot of tea, but I’ve never smelled or tasted such unique blends of tea before. For instance, I purchased a bag of Eve & Adam Green Tea (above). Just as the description says, the tea is fragrant with figs and bing cherries (ingredients include gunpowder green tea, green rooibus tea, pink rose petals, jasmine flowers, and blue malva flowers).

While at the market, I also tried the Valentina blend, which had red rooibus tea, honeybush, rosehips, red rose petals, cacao nibs, vanilla beans, hibiscus flowers, lotus flower petals, dried apples, chili flakes. I’m kind of wishing I bought a bag of that one too now…

To sum up, I highly recommend her teas for both personal consumption and as a gift! Theo said that she sells at a lot of market’s during the summer. In the mean time though, you can see/purchase her blends online.


Wall socket covers are ugly. Make them stylish for under $1

I might be obsessed. I can’t stop thinking about what else I can cover with pretty, colorful DIY projects! I fear my house and office might soon be covered paper and mod podge!

This from scratch project is a REALLY easy one, so if you’re thinking of testing out a do-it-yourselfer, now is the time.

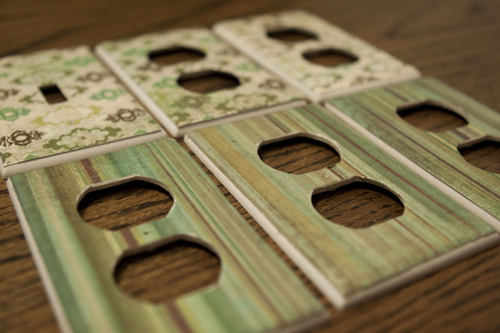
DIY Wall Socket Covers

Time: 5 minutes
Supplies:

  • 1 sheet of scrapbook paper (one sheet will cover about 6 socket covers); $0.29-$1.99/sheet
  • Mod Podge

Instructions: Use wall socket cover as a stencil. I placed the cover upsidedown to get an accurate stencil for just the face of the cover. Use x-acto knife to cut out center pieces. Mod podge the cover and paste on paper. I also painted a second layer of mod podge over the top of the paper to give it a varnished look. And, voilà!


How to fix up your office space without even trying: Part 1 (Adding color)

When looking at a photo of my office, I’m overwhelmed by the underwhelming green hue that radiates off the walls, furniture and ceiling light.

So, step one of my revamping project was to add some color, which I did with these three simple crowdsourced projects.

DIY Billy Balls (Felt Flowers) DIY Wallpaper your filing cabinet
  1. Yellow felt flowers (DIY Billy Balls; DesignSponge)
    Total Cost: $5.48/Total time: 20 minutes
    Felt: $2.49
    Wires: $2.99
  2. Refurbished, recycled glass bottle vase (Glass Bottle Crafts; Someday Crafts)
    Total cost: $4.98/Total time: 5 minutes
    Bottle: $2.99 at antique shop
    Spray paint: $1.99
  3. Elegant filing cabinet (yes it’s possible!) (Metal Cabinet Makeover; Green Submarine)
    Total cost: $3.88/Total time: 5-10 minutes
    Paper: $0.97 x 4 sheets = $3.88
    Glue : (used a glue stick in my office, free!)
    (You could also use contact paper, but I was already at the craft store and fell in love with this paper from the scrapbooking section).